Saturday, June 6, 2015

01-June-2015: Physical Pendulum Lab

Purpose- The purpose of this experiment is to find the period of physical pendulums of different shapes that oscillate at small angles.

About Pendulums

Simple Gravity Pendulum


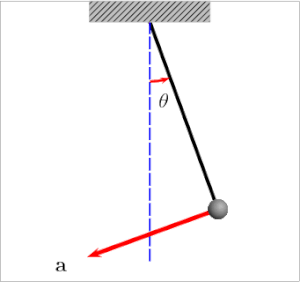
A so-called "simple pendulum" is an idealization of a "real pendulum" but in an isolated system using the following assumptions:
  • The rod or cord on which the bob swings is massless, inextensible and always remains taut
  • The bob is a point mass
  • Motion occurs only in two dimensions, i.e. the bob does not trace an ellipse but an arc.
  • The motion does not lose energy to friction or air resistance.


The differential equation which represents the motion of a simple pendulum is
{d^2\theta\over dt^2}+{g\over \ell} \sin\theta=0
where g is acceleration due to gravity, \ell is the length of the pendulum, and \theta is the angular displacement.

Part One

The apparatus of the first part of the experiment involves two ring stands, with a knife edge attached horizontally. The knife edge is used to hold up the ring that is concaved to half its thickness at a part of the inner side. There is another ring stand, with a photogate attached. Tape is attached to the ring so that the photogate can detect the position of the ring. The photogate measures how much time it takes for the physical pendulum to pass the photogate twice. This relates to the period of the pendulum, where it reaches the amplitude in the positive and negative direction from equilibrium and reaches equilibrium. A computer with LoggerPro was also needed to collect the data from the photogate and provide the period of the system.


First,  the moment of inertia of the ring was obtained using the following calculation 


And then we took the expression and force it to look like "alpha = - (        ) sin theta"


Within the (       ) we are able to obtain our predicted period.

Next, the actual experiment was performed where the ring was oscillated at small angles, and the experimental period was measured by the photogate. Once the equipment was set up as shown in the apparatus, the experiment was performed, and the result is shown below


The experimental period of the physical pendulum with the ring was found to be 0.720 seconds. The percent error of the period of this physical pendulum was calculated 


As can be seen, the percent error in this part of the experiment is very small, indicating that the theoretical period is the true period. It also shows that the assumption that when the angle is small, sin theta is almost equal to theta is also a good assumption. Lastly, it also shows that the method used to obtain the period is also accurate and correct. 


Part Two

The second apparatus of this experiment involves the same setup, except that different physical pendulums are attached. A semicircle by the center of its diameter was pivoted, and it was also pivoted for a second trial by the highest tip of the curve. 


First, the center of mass of the semicircle pendulum was obtained, using the procedure shown below


Picking dm as a strip of the semicircle, the center of mass in the x direction was zero, based on an origin in the center of the diameter. The center of mass in the y direction was found to be 4R/3pi.
Next, the moments of inertia of the semicircle about the center of the diameter, the center of mass, and the tip of the curve were obtained, using the same procedure as in part 1.


Using semicircular shells, the moment of inertia of the semicircle was found to be 1/2MR^2. Next, the moment of inertia of the semicircle at a pivot at the center of mass was found using the parallel axis theorem, and its derivation is found below


Lastly, the moment of inertia at the tip of the curve of the semicircle was found using the parallel axis theorem again.


Then, using the derived moments of inertia, the periods for the semicircle pendulum oscillating about the center of the diameter and the tip of the rim were calculated, as shown below


The same was performed for the semicircle oscillating about the highest tip of the rim.


Next, the shapes were measured and cut out from foam, and the actual experiment was performed, as in part 1, and the actual periods were obtained. The period found for the pendulum about its center of diameter is shown below


Again, the period is shown below for the pendulum about the tip of the rim


The percent error between the actual and theoretical values for the period of oscillation about the center of diameter was found to be 4.8%. Likewise, the percent error for the the period of oscillation about the tip of the rim was calculated as -4.7%. The percent error is high for a system such as a physical pendulum. These high percent errors, along with the percent error of the first part, show that the errors in this experiment are resulting from human error, and not error from the path taken to calculate the theoretical values  and the procedure used.

Conclusion

Part One
One reason that the experimental period value is slightly larger than the theoretical is due to uncertainties in the measurements of the dimensions of the ring. In addition, there is also uncertainty in the measurement of the period by the photogate. Also, some friction is present in the pivot where the ring is in contact with the knife edge, lowering the angular frequency by a little and resulting in a higher frequency. Lastly, air resistance as the pendulum is oscillating can result in a slower angular velocity and a larger period. As can be seen though, because the percent error is very small, these errors and uncertainties have little effect on the system.
Part Two
The reason for such a high percent error is that, due to the lack of time, the physical pendulums were not pivoted correctly, resulting in the wobbling of the pendulums and movement back and forth, instead of only side to side movement like a regular pendulum. In addition, there was some noticeable friction at the pivots, resulting in the physical pendulums slowing down over time during the experimental gathering of data. To make this experiment better, better pivots should be used  for the semicircle pendulums that does not result in the wobbling of the pendulums, and more time would be needed to perfect the experiment. Lastly, more dense material should be used for the pendulums instead of foam), giving the pendulums more control during the oscillations.


Thursday, May 21, 2015

20-May-2015: Conservation of Energy / Conservation of Angular Momentum

Purpose- To determine the max height of the stick from the ground after impacting a clay object using conservation laws and comparing it with logger pro.

A brief explanation on two of our conservation laws first of energy and then angular momentum.

Conservation of Energy

Energy can be defined as the capacity for doing work. It may exist in a variety of forms and may be transformed from one type of energy to another. However, these energy transformations are constrained by a fundamental principle, the Conservation of Energy principle. One way to state this principle is "Energy can neither be created nor destroyed". Another approach is to say that the total energy of an isolated system remains constant.

Conservation of Angular Momentum

The angular momentum of an isolated system remains constant in both magnitude and direction. The angular momentum is defined as the product of the moment of inertia "I" and the angular velocity.

The angular momentum is a vector quantity and the vector sum of the angular momenta of the parts of an isolated system is constant. This puts a strong constraint on the types of rotational motions which can occur in an isolated system. If one part of the system is given an angular momentum in a given direction, then some other part or parts of the system must simultaneously be given exactly the same angular momentum in the opposite direction. As far as we can tell, conservation of angular momentum is an absolute symmetry of nature. That is, we do not know of anything in nature that violates it.

Idea of the Experiment

The apparatus is a simple set up. We have a meter stick that has a hold drilled near the end of the stick. That will be our pivot point. We want the meter stick to be able to swing freely. On the other end of the meter stick will have tape with the sticky side out so that upon impact of the clay object it will help with an inelastic collision. The clay object will be stationary directly vertical with the stick.


The motion will be as followed from the above image.

Predicting Max Height

Before we start the experiment, we take measurements; mass of stick, mass of clay, length from the center of mass of stick to the pivot point and total length of the meter stick. Then predict the max height at which the stick and the clay reach from the ground before swinging back.


Big "M" is for the mass of the stick. Little "m" for the mass of the clay. Moment of inertia of the meter stick is twelve halves times mass of the stick times length squared.


We are going to approach this lab by calculating this problem into three parts. First at rest when the meter stick is horizontally up (held by someone) then released and the moment before the meter stick strikes the clay. Second the split second the stick is about the hit the clay and right after. Third part will be to calculate the max height.

Our origin is set on the horizontal at which the meter stick begins at rest.

First part we are going to use conservation of energy. We solve for angular velocity before impact.


Second part we utilize conservation of angular momentum. Plugging in angular velocity from part one into our initial angular velocity in part 2 will give us angular velocity upon impact.


Third part we use conservation of energy again. This time solving for our angle. The angle will lead to a value of predicting our max height off the ground.


We predicted our max height to be 0.29356 m

The Experiment 

Now to obtain our value from logger pro we set up and camera level with the clay piece and far enough to record the height the stick goes after impact.
We set our idea into motion and record.
From the video capture we are able to set up parameters in which we will use the program to give us a max height.


Logger pro's max height is 0.2904 m

Calculating error from our value and logger pros.


Combining both conversation laws of energy, angular momentum and back to energy was quite the task. Key thing to note is setting the origin and going about using the origin in each little calculation correctly. Also using the appropriate masses for each piece in kinetic energy and moment of inertia. Kinetic energy for most all of the experiment were the rotational formula. While determining moments of inertia, the part of what lengths to use, were confusing at first. After many attempts of calculating using these principals, we obtained a satisfying error of about one percent. Errors that may apply to this experiment is the angle of the video capture. Friction on the pivot. Some energy may have also been lost upon impact from traveling through the stick onto the pivot. We have uncertainty from the meter stick, length wise. The meter stick is old and chipping. Uncertainty in weighing the masses on the scale.


Wednesday, May 13, 2015

13-May-2015: Finding The Moment of Inertia of a Uniform Triangle about its Center of Mass

Purpose- We will figure out the moment of inertia about the center of mass of a right triangular thin plate, for two perpendicular orientations of the triangle.


For this lab we will use a new tool in determining the moment of inertia while rotating not at the center. This is called Parallel Axis Theorem. The moment of inertia of any object about an axis through its center of mass is the minimum moment of inertia for an axis in that direction in space. The moment of inertia about any axis parallel to that axis through the center of mass is given by


The expression added to the center of mass moment of inertia will be recognized as the moment of inertia of a point mass - the moment of inertia about a parallel axis is the center of mass moment plus the moment of inertia of the entire object treated as a point mass at the center of mass.


The experiment is as followed. We are using the same equipment from the angular acceleration lab where we have the Pasco rotational sensor with its disks, pulley, and hanging mass. This time we have a thin right triangle piece that will fit on top of the disk. Fortunately there is only one hole and it happens to be at the center of mass of the triangle. This will only allow us to run a set with the triangle long side vertical and another with the long side horizontal.


By winding up the string and hanging mass we let the system going and logger pro will assist us in developing data so that we may find angular acceleration. We will do three different trials three times to get an average angular acceleration of each system.


First trail is with disk and the holder. The slope of angular velocity give us angular acceleration. Though we must note that the values as the mass falls and rise are different. Which make sense since more mass is around the disk versus the hanging mass. Taking averages of multiply trials will help yield an accurate value for angular acceleration for each system.


Second is with disk, holder, and the thin right triangle piece positioned long side vertical.


Third is with disk, holder, and the thin right triangle piece positioned long side horizontal.


To reiterate the linear fit on the left is the mass rising back up and the linear fit on the right is the mass falling. During this yo yo effect the value of it rising is decelerating and falling going in the positive direction. If you look carefully at the angular velocity graphs, say were to allow logger pro to continue graphing the line. That line would get smaller and smaller until the moment of the system finally stops. The higher value of deceleration you have to take into fact that gravity plays a role.


Now we have these experimental values. Lets take a step back and derive the moment of inertia for a right triangle with the axis at the edge. 


We calculated inertia at the edge and we can take the parallel axis theorem part over so we can compare these calculations with moment of inertia center of mass from the experimental values.


Using the same moment of inertia equation from the angular acceleration lab. We will calculate "I" for both when the right triangle is long side vertical and long side horizontal. Which end up being identical in value. I, CoM =(2.408 * 10^-4) kg m^2

Comparing the both give us an error of 3.68 percent.


Error to take into account are, simulated zero friction is not completely zero friction, air resistance, and equipment seems like a go to but it would seem the only thing involving equipment would be how the air hose is hook up into the rotational device. The amount of air used and turning on and off the air can give different simulated friction free scenario in each trial. To conclude the lab I say it was a success in utilizing the new tool Parallel Axis Theorem to account for the distance the axis of rotation changes from the center of mass.


11-May-2015: Moment of Inertia and Frictional Torque

Purpose- We will ultimately be predicting the time it will take for a cart to roll down an incline attached by a string to an apparatus made of disks.

The apparatus is comprised of a large center disk in the middle and the sides are cylinders serving as an axis point of rotation or otherwise known as a central shaft.
We need to know the frictional torque of this apparatus. To do so we need to find inertia and angular velocity.

Image above- our net external is going to be frictional

To find inertia we will take measurements of each of the side cylinders and middle disk. Data that needs to be recorded is the diameter and the lengths/thickness.


With these values we are going to determine the volume of each piece. Each volume piece divided by the total volume will give us a percentage of mass for each piece of the apparatus. 
Multiplying each percentage to the total mass will yield the appropriate individual mass of each piece. 


Using the formula above with the mass we have and the measured radius we can find each of the pieces inertia and add them for the total inertia of the system.

Now to find angular acceleration was tricky. There are a few methods in which at the time is hard to understand and somewhat still is. One you can take the x and y components and use that to find angular acceleration. Second take a point and mark every rotation and time at which it returns to the same spot.

We took the video capture route and are going to attempt to find angular acceleration that way.


We made sure the camera lens was close to center with the apparatus rotational axis.


On the disk we taped a point in which we plot each time it made one rotation in logger pro.


We took the data and plotted a graph on excel to gain a graph that will give us angular acceleration.


The equation on the excel graph is mimicking the above equation 3. 
-0.2168 is equivalent to 1/2 α 


Put everything together and our frictional torque comes out to be -0.0092634 N m

Noted in the calculation image we tried to go the route of x and y components but found the method confusing and difficult for us. So we crossed out the attempted calculations. What you see for inertia and angular acceleration was the method described above in which we used to obtain our frictional torque.


Now we can move on the the experiment and predict the time a cart rolls down an incline with this apparatus.


Above image is how the set up of the experiment looks like.


Drawing a free body diagram will give us force equations combined with torque equations we can predict the time it will take for the cart to roll down 1 meter. The circled equation will find acceleration in which we will use in a kinematics equation to obtain the predicted time.


Then we ran the experiment and timed with a stop watch exactly how fast it takes the cart to go down the incline. We did this a few times to gain an average we can use to compare with the predict time.

The times from the stop watch were 8.34 s, 8.22 s, and 8.41 s. Giving us an average time of 8.32 s.

Error between the predicted time and the measured is 0.4 percent.


Conclusion- Combing the methods of Newton's second law, torque, moments of inertia, rotational, and kinematics assisted in predicting the time the carts goes down 1 meter. Problem solving this lab was a bit tricky for finding the angular acceleration because there was a few approaches that could have been taken. We originally attempted to find angular acceleration with the x and y components but was lost in the calculations. We had to switch the method to a way in which we could better understand the process of obtaining angular acceleration. Using the video capture and plotting a dot every time the disk made one rotation until it stopped was better for us. Understanding that the negative sign meant deceleration for angular acceleration. But when we plugged into the equation solving for acceleration the friction is being subtracted from tension times radius of the apparatus.
Errors that played a role could have been a bit from the carts wheels and the track, that friction. Not having the string completely parallel with the inclined track might have a minor impact that was not account for in the expression. The measured uncertainty from the equipment is another reason from the error. 


Wednesday, May 6, 2015

04-May-2015: Angular Acceleration

Purpose: Applying a torque we know onto an object that can rotate, so that we may measure the angular acceleration.


Torque is a measure of how much a force acting on an object causes that object to rotate. The object rotates about an axis, which we will call the pivot point, and will label 'O'. We will call the force 'F'. The distance from the pivot point to the point where the force acts is called the moment arm, and is denoted by 'r'. Note that this distance, 'r', is also a vector, and points from the axis of rotation to the point where the force acts.


Torque is defined as                                     = r x F = r F sin()


Angular acceleration can be defined by  {\alpha} = \frac{{d\omega}}{dt} = \frac{d^2{\theta}}{dt^2} or {\alpha} = \frac{a_T}{r} 

For two-dimensional rotational motionNewton's second law can be adapted to describe the relation between torque and angular acceleration:      {\tau} = I\ {\alpha} 
 {\tau} is the total torque exerted on the body, and I is the mass moment of inertia of the body.


Part 1


For this experiment the apparatus we set up is comprised of disks that have marks on the edge that is read through the Pasco rotational sensor and we can use logger pro to extract angular velocity data and time. There different sized disk, as well as pulleys and we will be using different amount of hanging masses to collect data. Also for one of the six trials we are suppose to do, a motion detector will be plugged in so that we may compare velocity of the hanging mass versus angular velocity of the disk as well as acceleration of the hanging mass versus the angular acceleration of the disk.


The apparatus will bounce up and down as the hanging mass falls and is retracted by the pulley and disk. Logger pro will then develop graphs of angular velocity over time. We will then take the slope from when the mass falls and the mass rises. Summing both quantities from the slopes will give us an average angular acceleration.


Above image is hanging mass of 25 g. 
Small pulley with diameter of 2.602 cm and mass 10 g. 
Steel disk with diameter 13.515 cm and mass 1361 g.


Above image is hanging mass of 50 g. 
Small pulley with diameter of 2.602 cm and mass 10 g. 
Steel disk with diameter 13.515 cm and mass 1361 g.


Above image is hanging mass of 75 g. 
Small pulley with diameter of 2.602 cm and mass 10 g. 
Steel disk with diameter 13.515 cm and mass 1361 g.


Above image is hanging mass of 25 g. 
Large pulley with diameter of 5.00 cm and mass 20 g. 
Steel disk with diameter 13.515 cm and mass 1361 g.


Above image is hanging mass of 25 g. 
Large pulley with diameter of 5.00 cm and mass 20 g. 
Steel aluminum with diameter 13.515 cm and mass 466 g.


Above image is hanging mass of 25 g. 
Large pulley with diameter of 5.00 cm and mass 20 g. 
Steel disk with diameter 13.515 cm and mass 1361 g.
We engaged the bottom disk to rotate adding a mass of 1348 g with the same diameter of 13.515 cm.


Above image is a table of our data we recorded.


Quick Summary
Logically we can see that angular acceleration is increased when more mass is added to the force of torque. With a pulley doubled in size, trial 1 compared to trial 4, our value in trial 4 shows us that the larger the radius less acceleration there is. When we engaged the bottom steel disk in rotation, trial 6, the acceleration of the system significantly dropped. More weight centered at the disk that is rotating will cause the system to become slower. Versus when we add more weight to the hanging mass will cause the system to increase in acceleration.


Part 1.2

Here we added a motion detector so that we may accomplish comparing angular velocity with velocity and angular acceleration with acceleration.

As before the Pasco rotational sensor will develop a graph so that we may find angular velocity and angular acceleration. Simultaneously, as the Pasco rotational sensor gives us that data we will also have the motion sensor collecting data so that we may find velocity and acceleration of the hanging mass.


Above image is how our apparatus was set up.


Above image is our graphs that logger pro developed.


Above image is the avg of the apparatus's fall and rise of the hanging mass and the rotation of the disk for angular velocity, angular acceleration, velocity, and acceleration.

To compare the two we will use these formulas.   &  


\vec \omega of the disk is 7.04 rad/s. Calculating \vec \omega with the hanging mass over radius is 6.85 rad/s.

There is a 2.8 percent error between the measured and the calculated \vec \omega.


α of the disk is 3.47 rad/s/s. Calculating α with the hanging mass over radius is 3.36 rad/s/s.

There is a 3.2 percent error between the measured and calculated α. 


Part 2

With the data collected we will be able to figure out the moment of inertia of each of the trials.

First we come up with a model to find the moments of inertia in which we will compare with the perpendicular inertia of the system.


Below is our measured inertia versus the perpendicular inertia from the disks.


Final Summary

Part one it seemed our data made sense. As angular acceleration was increasing when we were adding weight to the hanging mass. When we changed the mass of the disks from lightest to heaviest angular acceleration went slower the heavier the disks were.

Errors for experiment 1.2 with the motion detector yielded promising results. As the comparison from angular velocity versus velocity and angular acceleration versus acceleration gave of low error values between the two. Its hard to say why an error would exist as the experiment ran both the rotational sensor and the motion sensor were collecting at the same time. It is possible that the disk sensor was slightly collecting data faster as the motion detector.

Part two, data for the moment of inertia are not even close to the projected 2 percent or 47 percent error. I retyped in the calculator our values at least ten times. Which is not saying much for the error is our own some how. I know the amount of air plays a role in giving us a frictionless disk during the experiments. During each trial i know we were turning off and on the air. That could be a factor. Trial 1 and 4 we would have hoped that the average angular acceleration in both the value would double. We verified the setting on logger pro and ran trials over again. It is a mystery to why the numbers we calculated from the measured values do not match.
Assuming all went well the measured values we plug into the expression that was derived would have came close to the perpendicular moment of inertia. Telling us that the amount of force required to rotate that disk is equivalent to the speed and acceleration of the falling hanging mass.